This article may contain affiliate links. If you buy through them, guitar.care may earn a small commission at no extra cost to you.
Introduction
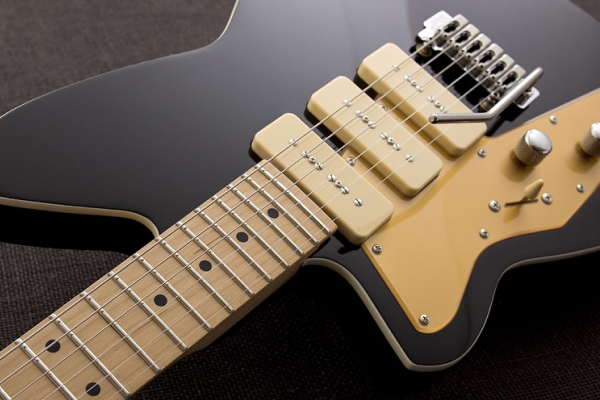
A proper setup is essential for your guitar to play its best. While professional setups are always an option, learning to perform basic adjustments yourself can save money and give you more control over how your instrument plays. This guide will walk you through the fundamentals of guitar setup with a focus on three key adjustments: truss rod (neck relief), action (string height), and intonation.
When to Set Up Your Guitar
Consider setting up your guitar when:
- Strings buzz against frets when playing
- Action feels too high, making playing uncomfortable
- Guitar doesn't stay in tune up the neck
- You've changed to a different string gauge
- Seasonal changes have affected playability
- You've purchased a new or used guitar
Tools You'll Need
Before starting, gather these essential tools:
- Set of feeler gauges (0.001" to 0.025")
- Capo
- Appropriate truss rod wrench for your guitar
- Small ruler with 1/64" or millimeter measurements
- Electronic tuner (preferably a strobe tuner for intonation)
- Screwdrivers (Phillips and flathead)
- Hex keys/Allen wrenches in various sizes
- String winder and cutter
- Polishing cloth
- Notebook to record your adjustments
Step 1: Preparation
Before making any adjustments:
- Clean your guitar thoroughly
- Install fresh strings if your current ones are old
- Tune to your preferred pitch (standard tuning is recommended for beginners)
- Take "before" measurements to track your changes
- Work in a well-lit area with a stable surface to place your guitar
Step 2: Adjusting Neck Relief (Truss Rod)
The truss rod controls the curvature of the neck. A small amount of forward bow (relief) is typically desirable to prevent buzzing.
How to Check Neck Relief:
- Hold down the low E string at the first fret and at the fret where the neck joins the body (around 14th fret)
- Observe the gap between the bottom of the string and the top of the 7th or 8th fret
- Measure this gap with feeler gauges
Target Measurements:
- Electric guitars: 0.005" to 0.010" (0.12mm to 0.25mm)
- Acoustic guitars: 0.008" to 0.012" (0.20mm to 0.30mm)
Making Adjustments:
- Locate your truss rod adjustment point (typically at the headstock or heel)
- Use the appropriate tool for your guitar
- Turn clockwise to reduce relief (straighten the neck)
- Turn counterclockwise to increase relief (add bow to the neck)
- Make small adjustments (1/8 to 1/4 turn maximum)
- Wait 10-15 minutes for the neck to settle before measuring again
- Retune and repeat if necessary
CAUTION: If you encounter significant resistance or the truss rod is at its limit, stop and consult a professional.
Step 3: Adjusting Action (String Height)
Action refers to the height of the strings above the frets. Lower action is easier to play but may cause buzzing if too low.
How to Measure Action:
- Tune your guitar to pitch
- Measure the distance from the top of the 12th fret to the bottom of each string
Target Measurements at 12th Fret:
Electric Guitars:
- Low E: 4/64" (1.6mm)
- High E: 3/64" (1.2mm)
Acoustic Guitars:
- Low E: 7/64" (2.8mm)
- High E: 5/64" (2.0mm)
Adjusting Electric Guitar Action:
- For Tune-o-matic style bridges: Turn the thumbwheels to raise or lower the bridge
- For Fender-style bridges: Adjust the height screws on each saddle
- For Floyd Rose: Adjust the posts at the bridge pivot points
Adjusting Acoustic Guitar Action:
- Action is adjusted by carefully sanding down the saddle
- For beginners, this is best left to professionals
- A temporary adjustment can be made with a shim under the saddle to raise action
Step 4: Setting Intonation
Intonation ensures your guitar plays in tune all the way up the neck.
How to Check Intonation:
- Tune each string to pitch
- Compare the pitch of the open string to the same string at the 12th fret (should be exactly one octave higher)
- If the 12th fret note is sharp, the string length needs to be increased
- If the 12th fret note is flat, the string length needs to be decreased
Adjusting Electric Guitar Intonation:
- Locate the saddle adjustment screws at the bridge
- If the 12th fret note is sharp: Move the saddle away from the neck (increasing string length)
- If the 12th fret note is flat: Move the saddle toward the neck (decreasing string length)
- Make small adjustments, retune, and check again
- Repeat for each string
Adjusting Acoustic Guitar Intonation:
Intonation on acoustic guitars is set when the saddle is shaped and positioned. Major intonation issues on acoustics typically require professional service.
Step 5: Final Adjustments and Checks
- Check and adjust pickup height if applicable (typically 1/8" to 3/16" from the string when pressed at last fret)
- Verify nut slot depths (strings should just barely clear the first fret when open)
- Play up and down the neck, checking for buzzes or dead spots
- Make fine adjustments as needed
- Clean and polish your guitar
Troubleshooting Common Issues
Persistent String Buzz:
- Check for uneven frets
- Verify that nut slots aren't cut too deep
- Ensure adequate relief for your playing style
- Raise action slightly
Poor Tuning Stability:
- Check for binding at the nut
- Ensure strings are properly stretched
- Verify tuning machine functionality
- Check bridge stability
Dead Spots or Fretting Out:
- Look for high or low frets
- Check neck pocket connection (electric guitars)
- Verify truss rod adjustment
Conclusion
Setting up your own guitar is a rewarding skill that deepens your connection with your instrument. Start with small, conservative adjustments and keep detailed notes of your changes. With practice, you'll develop a feel for how each adjustment affects playability and tone.
Remember that setup preferences are personal - what works for one player may not work for another. The measurements provided are starting points, not absolute rules. Trust your ears and hands to guide you toward the setup that best suits your playing style.
If you encounter any issues you're not comfortable addressing, don't hesitate to consult a professional luthier or guitar technician. Some adjustments, particularly on acoustic guitars, require specialized tools and expertise.