This article may contain affiliate links. If you buy through them, guitar.care may earn a small commission at no extra cost to you.
Introduction
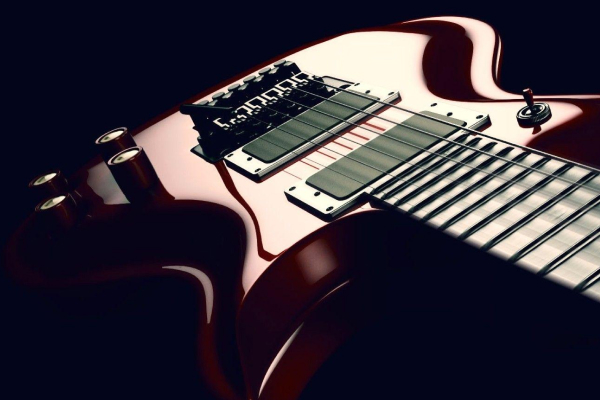
Vintage guitars require special care when it comes to cleaning and maintenance. Unlike modern instruments, vintage guitars often have delicate finishes, aging components, and historical value that can be compromised by improper cleaning techniques. This guide will help you preserve both the playability and value of your vintage instrument through proper cleaning methods.
Understanding Vintage Guitar Finishes
Before cleaning any vintage guitar, it's crucial to identify the type of finish it has. Common vintage finishes include:
Nitrocellulose Lacquer
Used extensively from the 1920s through the 1960s, nitrocellulose lacquer is thin, porous, and extremely vulnerable to chemicals, alcohol, and even some modern guitar polishes. It often develops checking (fine cracks) with age and can be easily damaged by aggressive cleaning.
Shellac
Common on pre-1930s instruments, shellac is even more delicate than nitrocellulose and dissolves readily with alcohol. It requires extremely gentle cleaning approaches.
Early Polyurethane and Polyester
Found on some instruments from the late 1960s and 1970s, these finishes are more durable than nitrocellulose but may yellow or crack with age and still require careful handling.
Essential Supplies for Vintage Guitar Cleaning
Gather these gentle, appropriate supplies before beginning:
- Microfiber cloths (multiple, clean ones)
- Pure cotton cloths (old t-shirts work well)
- Distilled water (tap water can contain minerals that may damage finishes)
- Vintage-safe guitar polish (specifically formulated for nitrocellulose finishes)
- Naphtha (pure lighter fluid - for stubborn grime on resilient finishes only)
- Soft bristle brushes (like a clean toothbrush for hard-to-reach areas)
- Cotton swabs
- Compressed air (for dust in tight spaces)
What to Avoid
Never use these products on vintage instruments:
- Silicone-based polishes (they can penetrate finish cracks and complicate future repairs)
- Household cleaners (including Windex, 409, etc.)
- Alcohol-based products (they can dissolve shellac and damage nitrocellulose)
- Abrasive cloths or papers
- Excessive moisture of any kind
- Guitar polishes not specifically formulated for vintage instruments
Step-by-Step Cleaning Process
1. Preliminary Inspection and Documentation
- Photograph your guitar before cleaning for reference
- Note any existing finish cracks, wear spots, or damage
- Identify particularly fragile areas that need extra care
- Remove strings if performing a deep cleaning
2. Dust Removal
- Use compressed air to blow dust from hard-to-reach areas like around pickups, bridges, and control cavities
- Gently wipe the entire guitar with a dry microfiber cloth
- Use a soft brush for textured areas or binding crevices
3. Body Cleaning
- Slightly dampen (not wet) a microfiber cloth with distilled water
- Test in an inconspicuous area first
- Work in small sections, immediately drying with a clean cloth
- For stubborn grime on stable finishes, slightly dampen a cloth with naphtha (test first and ensure good ventilation)
- Never allow any liquid to pool on the surface
4. Hardware Cleaning
- Clean metal parts with a slightly damp cloth, then dry immediately
- For oxidized hardware, use cotton swabs slightly dampened with distilled water
- Avoid removing patina from aged hardware as this can reduce vintage value
- Never remove hardware unless absolutely necessary and you have the proper tools and experience
5. Fretboard Cleaning
- For maple fretboards with finish: treat like the body with minimal moisture
- For unfinished rosewood or ebony:
- Gently clean with a barely damp cloth
- Use a soft brush for dirt around frets
- Consider a tiny amount of specialized fretboard conditioner only if the board is very dry (test in an inconspicuous area first)
- Clean frets with a cotton cloth, being careful not to scratch the fretboard
6. Polishing (Optional)
- Use only polish specifically formulated for vintage instruments
- Apply to a cloth first, never directly to the guitar
- Use minimal product and gentle circular motions
- Buff with a clean, dry microfiber cloth
- When in doubt, skip polishing altogether - many collectors prefer the natural patina
Special Considerations for Different Vintage Guitars
Pre-1960s Acoustics
- Often have extremely thin finishes that can be damaged by even light pressure
- May have hide glue joints that are sensitive to moisture
- Check for loose braces before cleaning
- Be extremely cautious around any cracks or repairs
1950s-1960s Electric Solid Bodies
- Nitrocellulose finishes often show checking (fine cracks)
- Clean along the direction of checking, not against it
- Be careful around binding, which may have shrunk or become brittle
- Original plastic parts (pickguards, pickup covers) may be deteriorating and require minimal handling
1970s Instruments
- Transition period with various finish types - identify before cleaning
- Some polyester finishes can withstand slightly more aggressive cleaning, but still exercise caution
- Watch for finish overspray in cavities and under pickguards
Dealing with Common Vintage Guitar Issues
Checking (Finish Cracks)
Checking is natural in nitrocellulose finishes and often adds to vintage appeal. Do not attempt to repair or fill these cracks. Clean very gently along the direction of the cracks, not across them.
Cloudy or Hazy Finish
Often caused by outgassing or chemical changes in the finish. Gentle cleaning may help, but aggressive polishing can make it worse. Accept some haziness as part of the vintage character.
Oxidized Hardware
Patina on hardware is valued by collectors. Clean gently to remove dirt but preserve the aged appearance. Never use metal polish on vintage hardware unless you specifically want to reduce the vintage value.
Yellowed Plastic Parts
Yellowing of white plastic parts is normal and desirable in vintage instruments. Clean gently but do not attempt to whiten these parts, as this will reduce collector value.
When to Seek Professional Help
Consider consulting a professional luthier who specializes in vintage instruments if:
- Your guitar has significant historical or monetary value
- There are structural issues like cracks or loose braces
- The finish is flaking or extremely deteriorated
- You encounter stubborn grime that doesn't respond to gentle cleaning
- There are electronics issues that require disassembly
Conclusion
Cleaning a vintage guitar is about preservation rather than restoration. The goal is to remove harmful dirt and oils while preserving the instrument's patina and character that comes with age. Always err on the side of caution - it's better to under-clean than to damage an irreplaceable vintage instrument.
Remember that signs of age and wear are part of what makes vintage guitars special. The small dings, checking, faded finish, and worn frets tell the story of the instrument's journey through time. Clean and maintain your vintage guitar with respect for its history, and it will continue to inspire for generations to come.